
When things go wrong…
All of my previous projects have been much, much smaller in scale (like MUCH smaller) so there was always going to be unforeseen hurdles to overcome with this piece. Doing things at scale means it’s much harder on the hands, as you’re constantly moving around quite heavy pieces and of course everything takes so much longer. When things go ‘wrong’, it’s okay and it’s a learning process. It can be quite annoying and overwhelming, especially when there are deadlines to meet, but you just have to keep calm and collected and brainstorm possible solutions. This week was full of it. Let’s get into it.
I had a good plan at this point, all the big sections had been quilted and were attached and it was starting to come together a little. So I sat stitching away, headphones in and over 20 hours of stitching later, I realised I had zoned out and missed a massive issue. I was focusing on the dense layers of stitch that would make up the tree line in the background of the piece, going though different colours of dark green and brown thread, using an embroidery hoop to keep the fabric stable as I did so. But when I took the hoop off, I realised that it didn’t actually help at all, and the fabric underneath was warped like crazy.
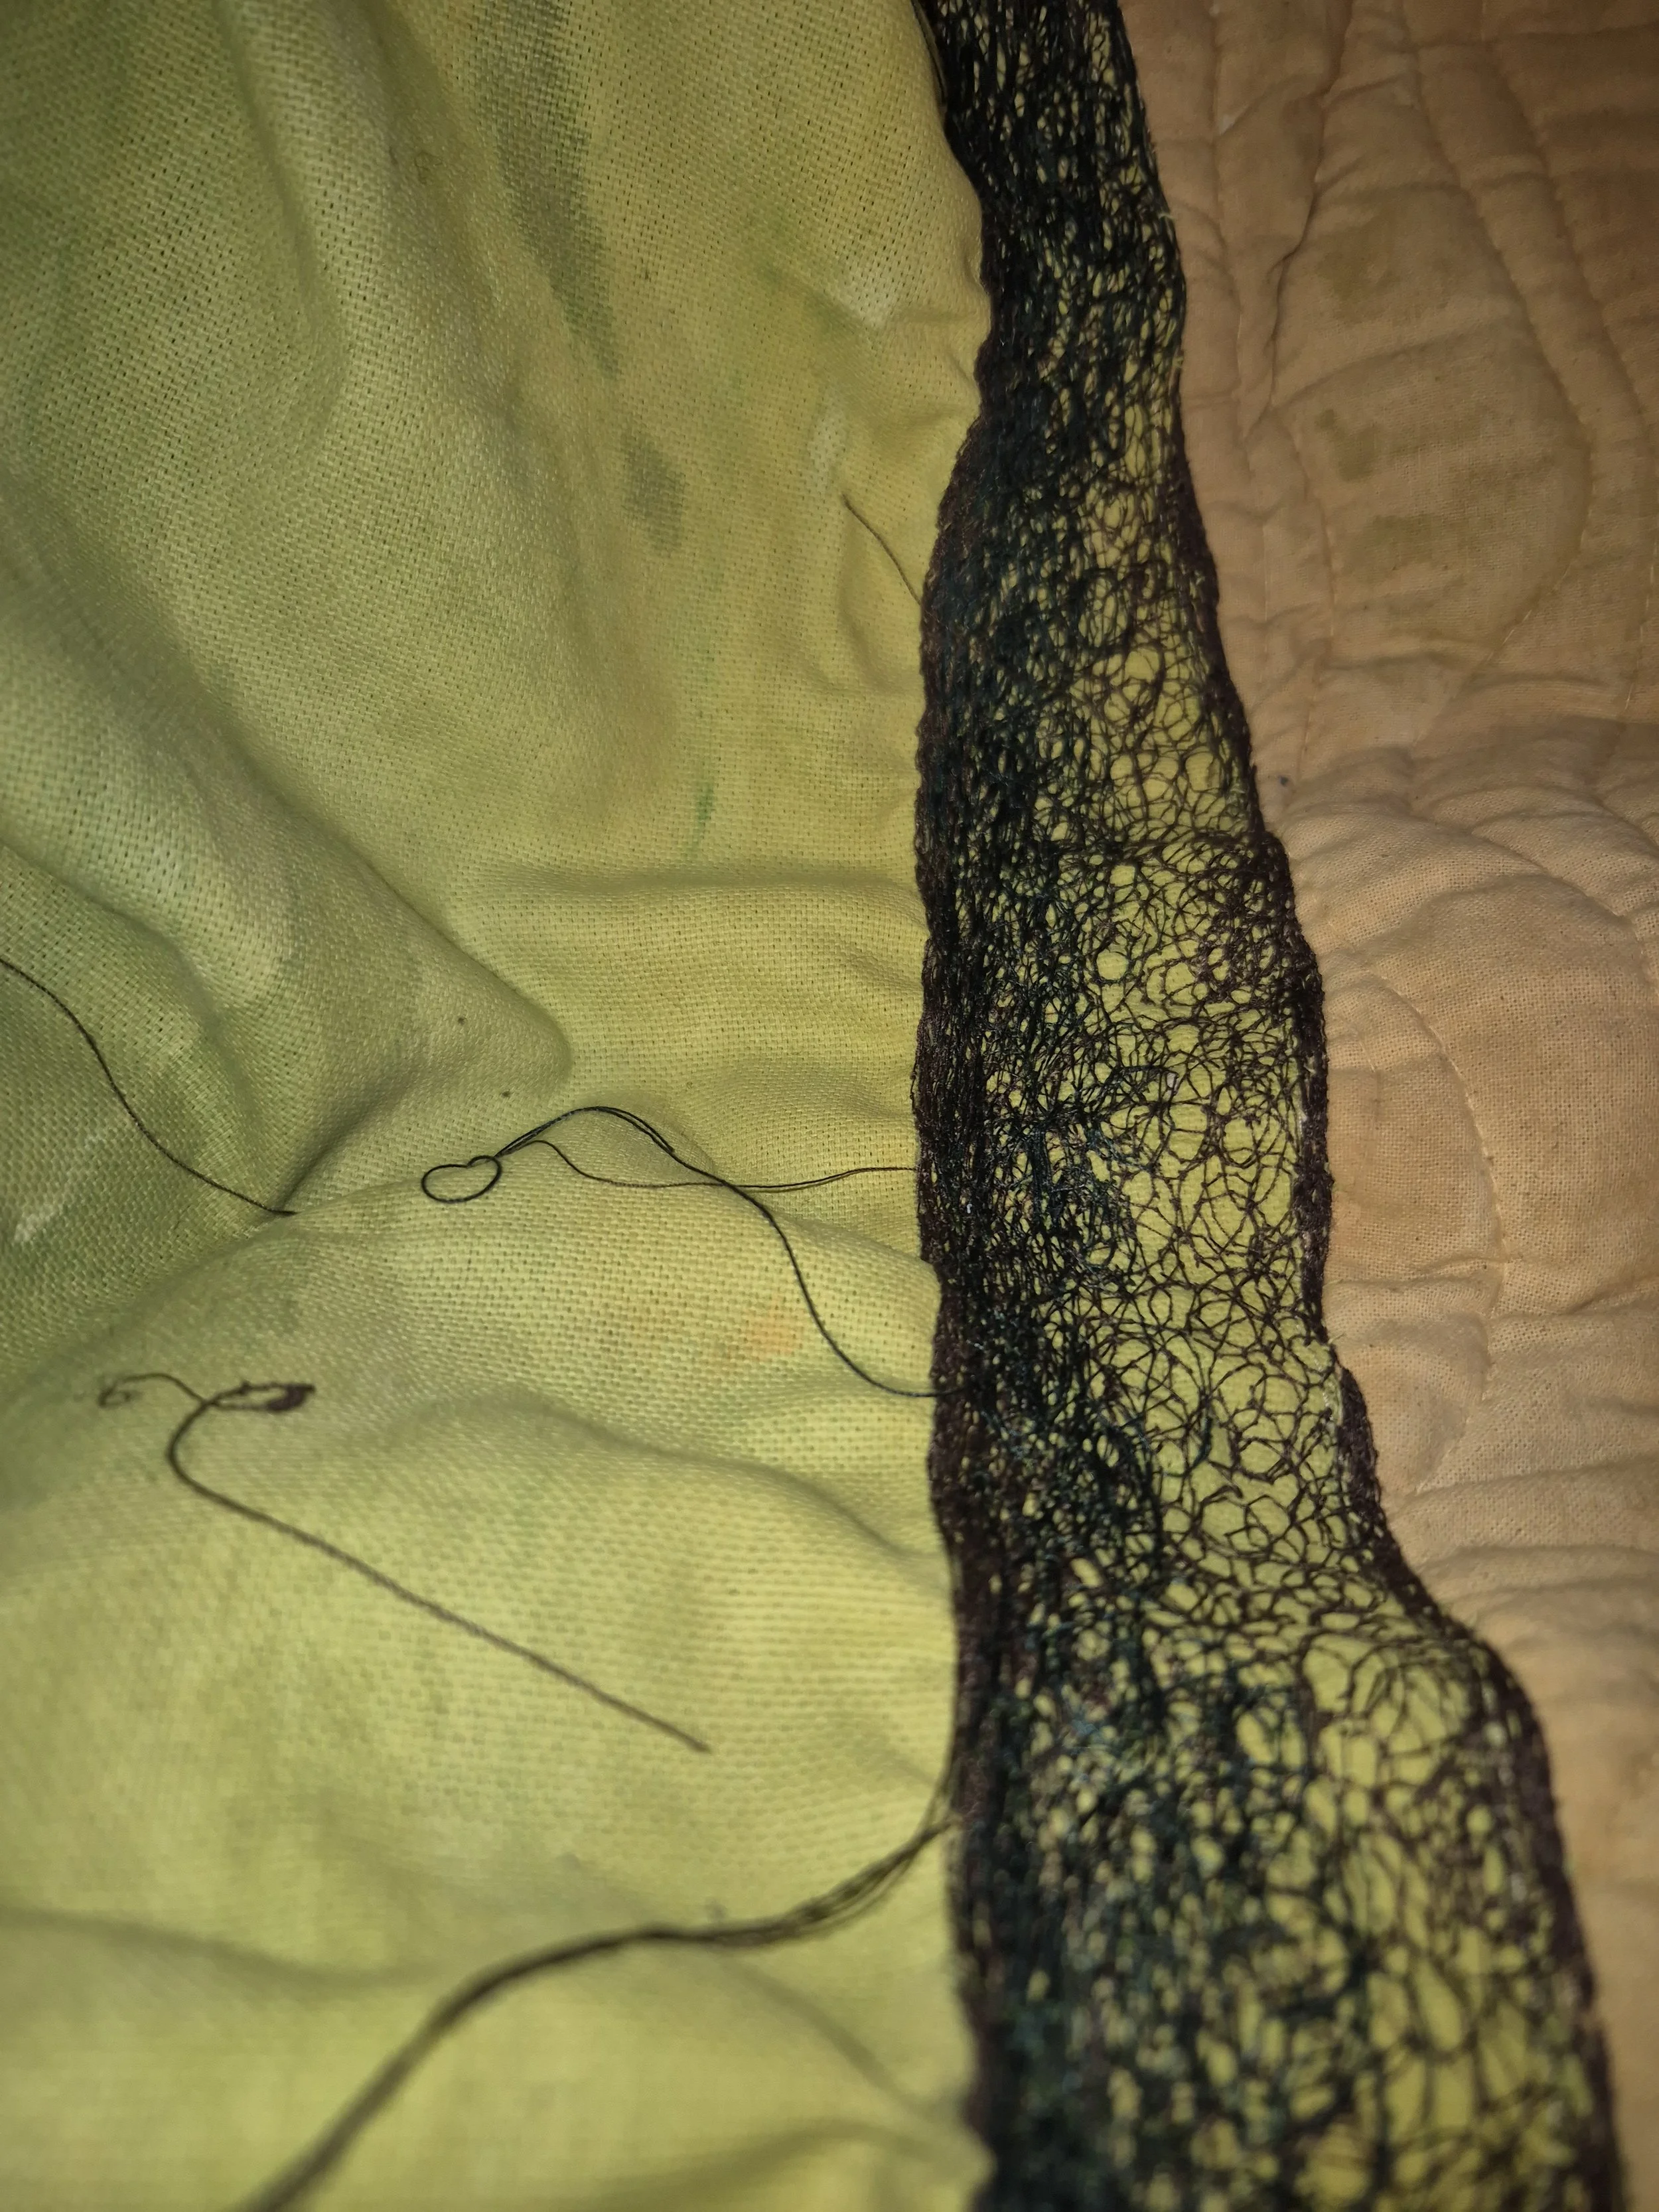
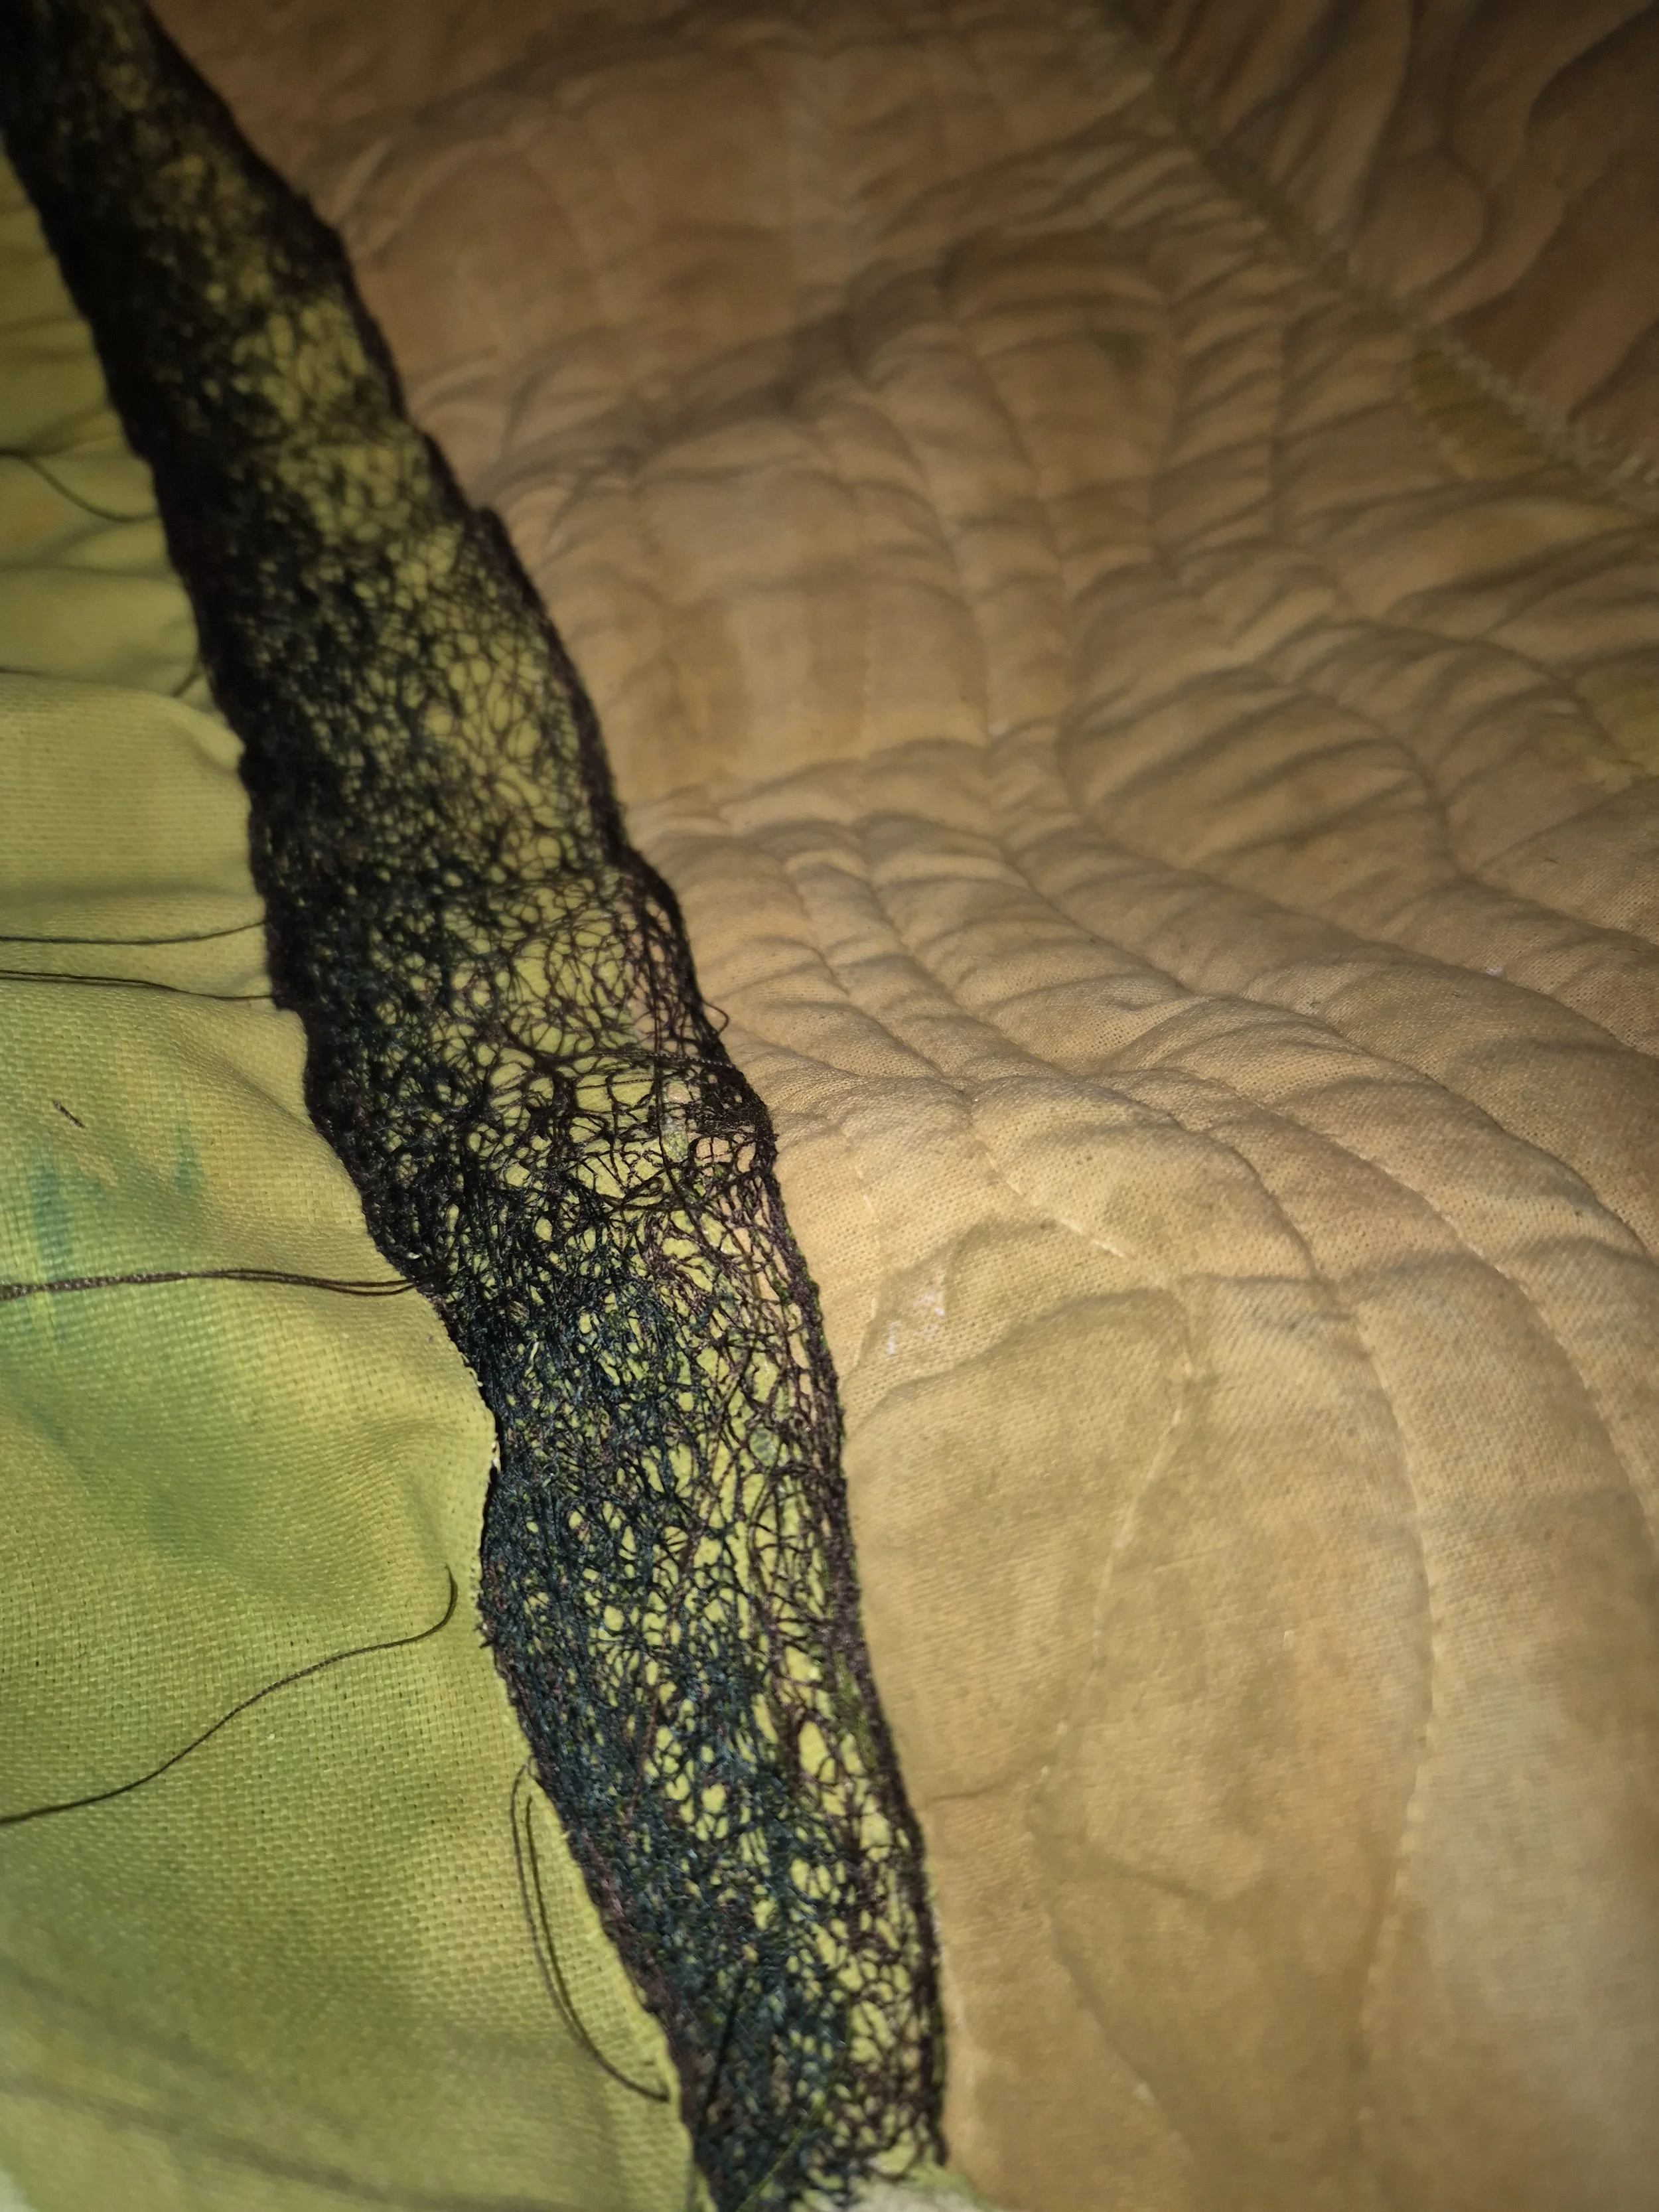
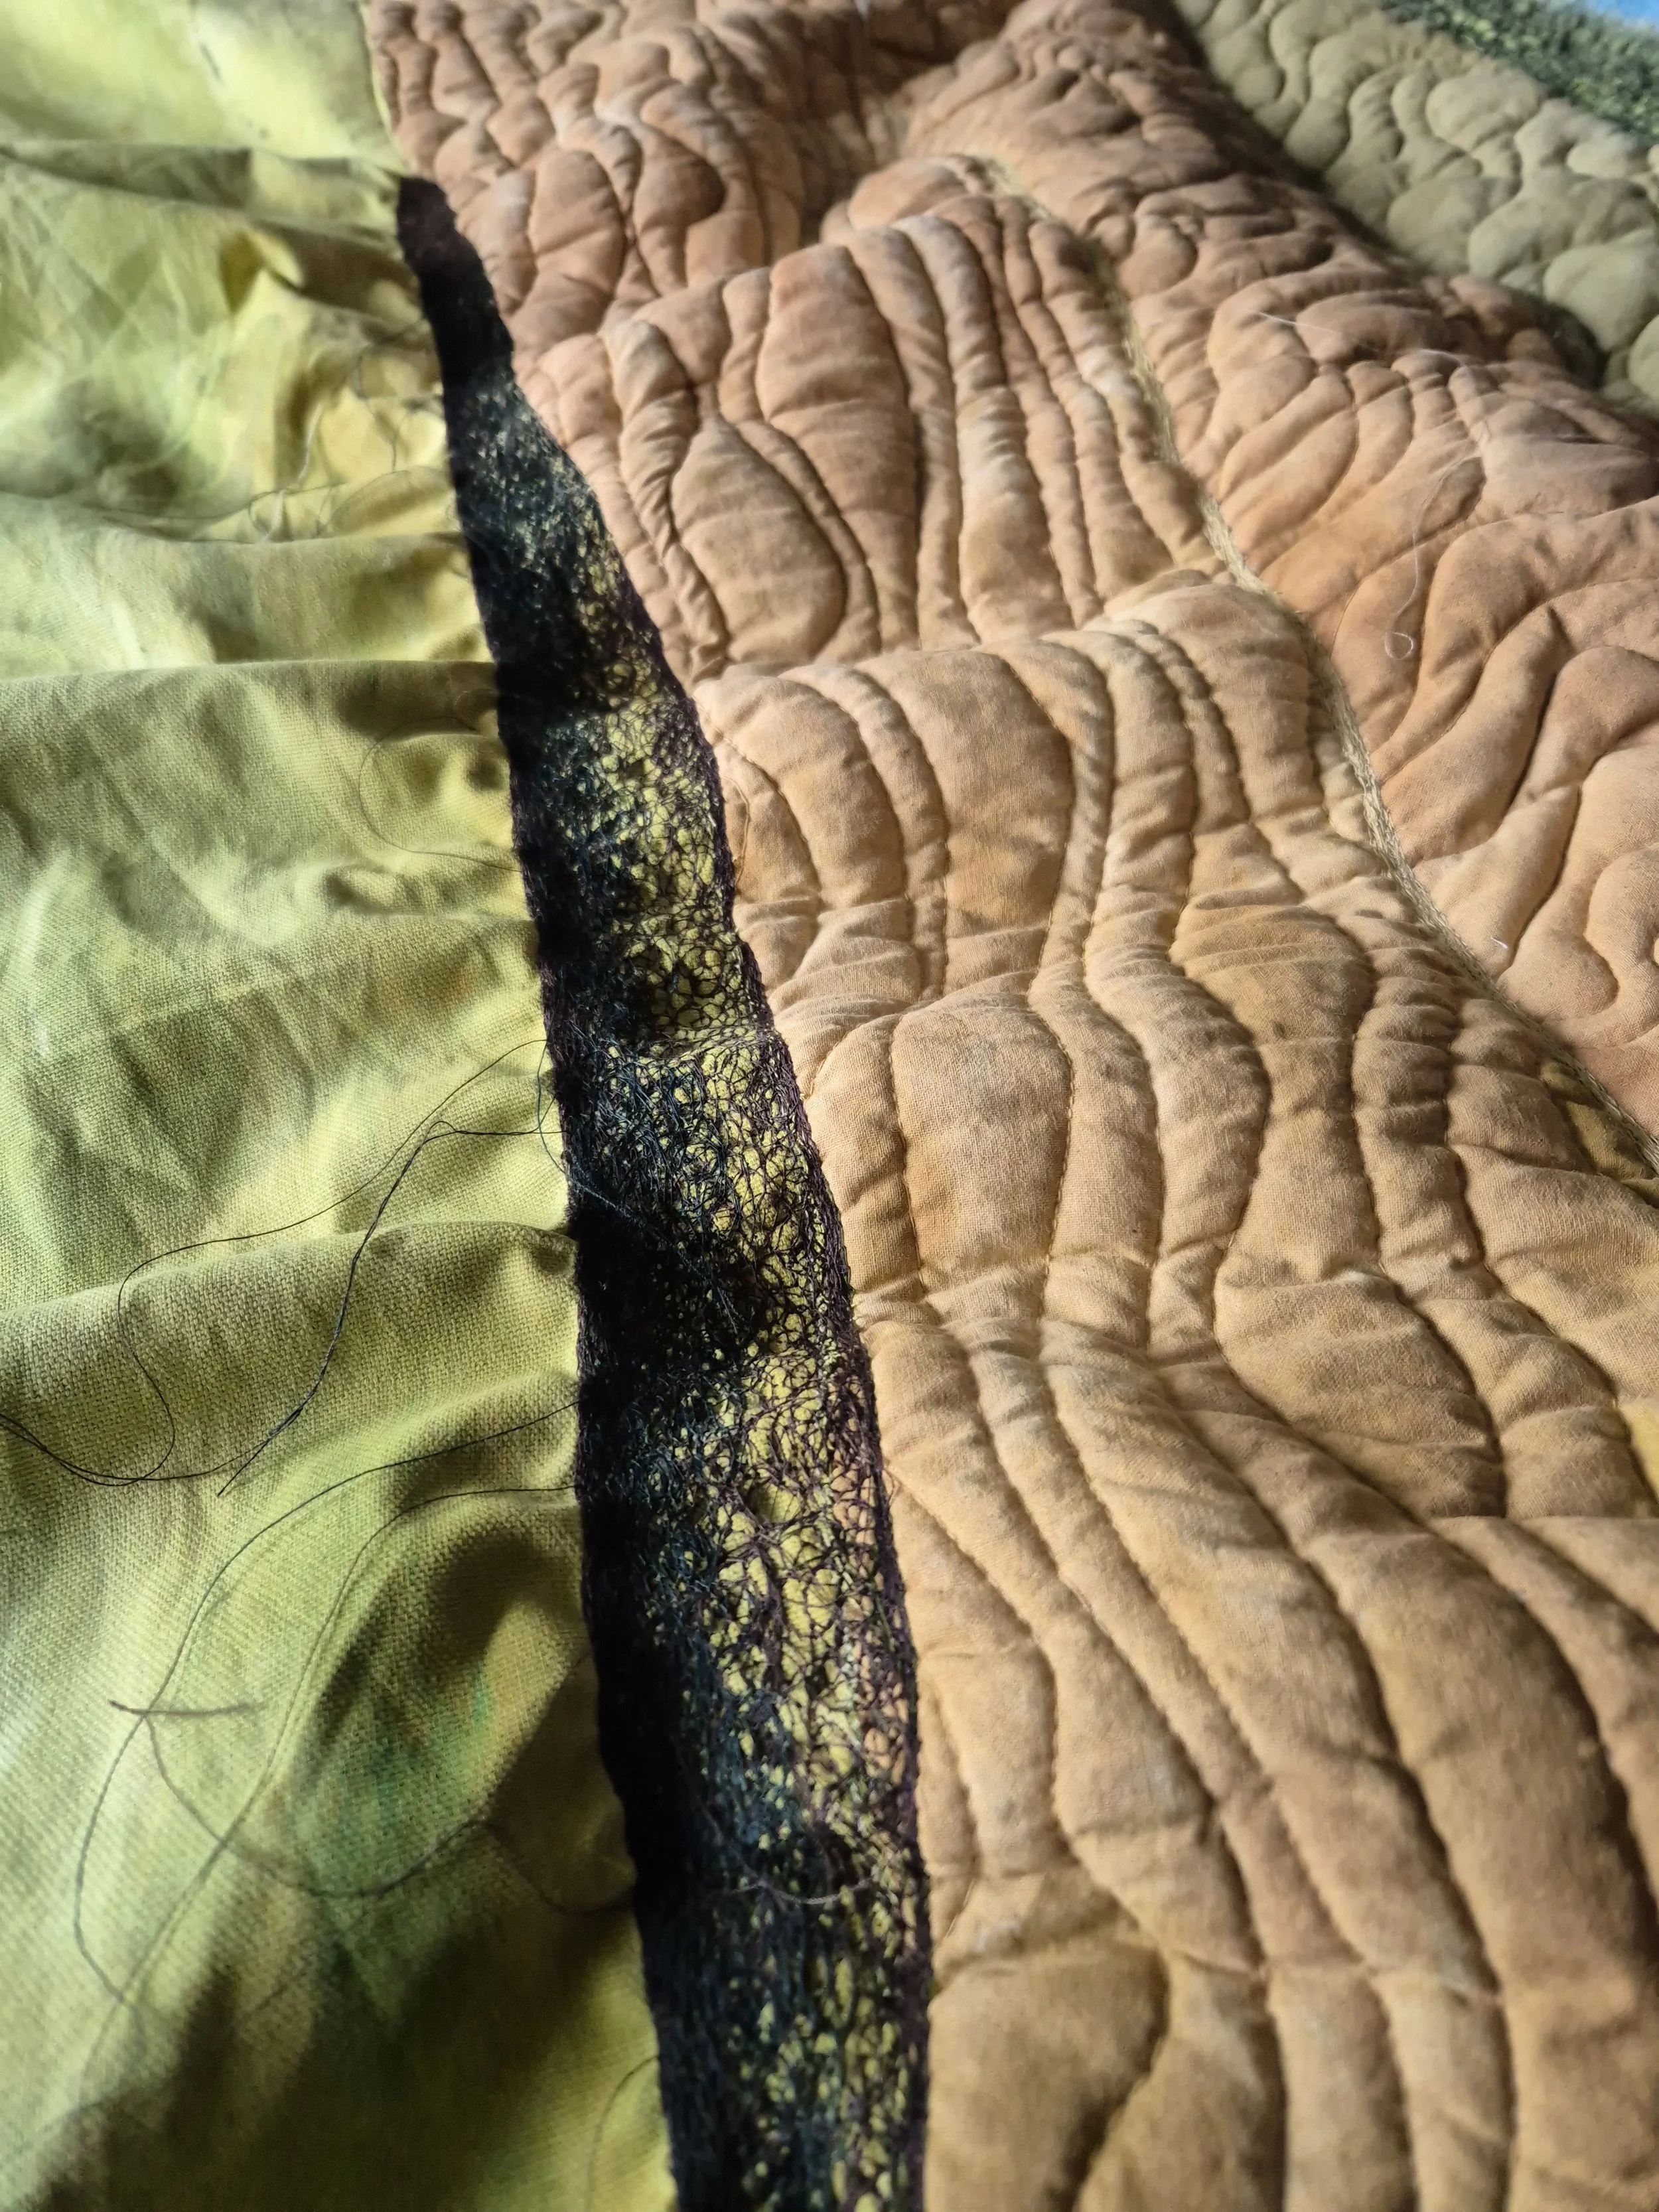
You can see in these pictures, where the stitching meets the quilted areas it no longer lays flat.
…and I was devastated. I didn’t want to look at it or even acknowledge it for about 2 days. I got inside my own head and just couldn’t find a way to fix it. So I took a few days away and didn’t think about it at all. Then I realised that the dense layer of stitch had now formed it’s own layer, which was smaller than the quilted part because the fabric underneath was being pulled really tight. So, I could ‘fix’ it by taking it apart. Yes, drastic I know. By disassembling the piece, I could fit it all back together and make it lay flat. I would however have to sacrifice some of the length on the side, since the fabric that is now underneath the stitching has shrunk, so I also added in another quilted panel row to make up for it and sewed the trees back on.
It took hours to fix this, but I found the problem pretty early considering how much of the project is left to do! But now I need to change my plans a little. Originally I intended on stitching straight onto the main fabric of the piece, but this same issue will happen every time, and it just doesn’t make sense to keep taking the whole thing apart each time. So now I’m going to come up with a solution to still have all the details that need adding, but being able to do these separately and add them onto the piece with minimal sewing, So I’m going to be sat drawing up some ideas, if you have any suggestions or comments feel free to send me a message on Instagram @Sebbystudios :)
When creating, things don’t always go to plan and it can be really frustrating, but that’s all part of the process. If you keep on going and trialling new approaches, you’ll learn so much and your work will be even better than you could have imagined!
Thank you once again for taking the time to read along with me, I’ll be back next week with (hopefully) some more solutions and more progress.
-Jodie