
Let's get going!
Last week I explained how I did a quilting experiment. Today I'll put that into practice and make the huge panels that will become the fields and sky in the background of the piece.
Here’s a reminder of the images i’m working from:
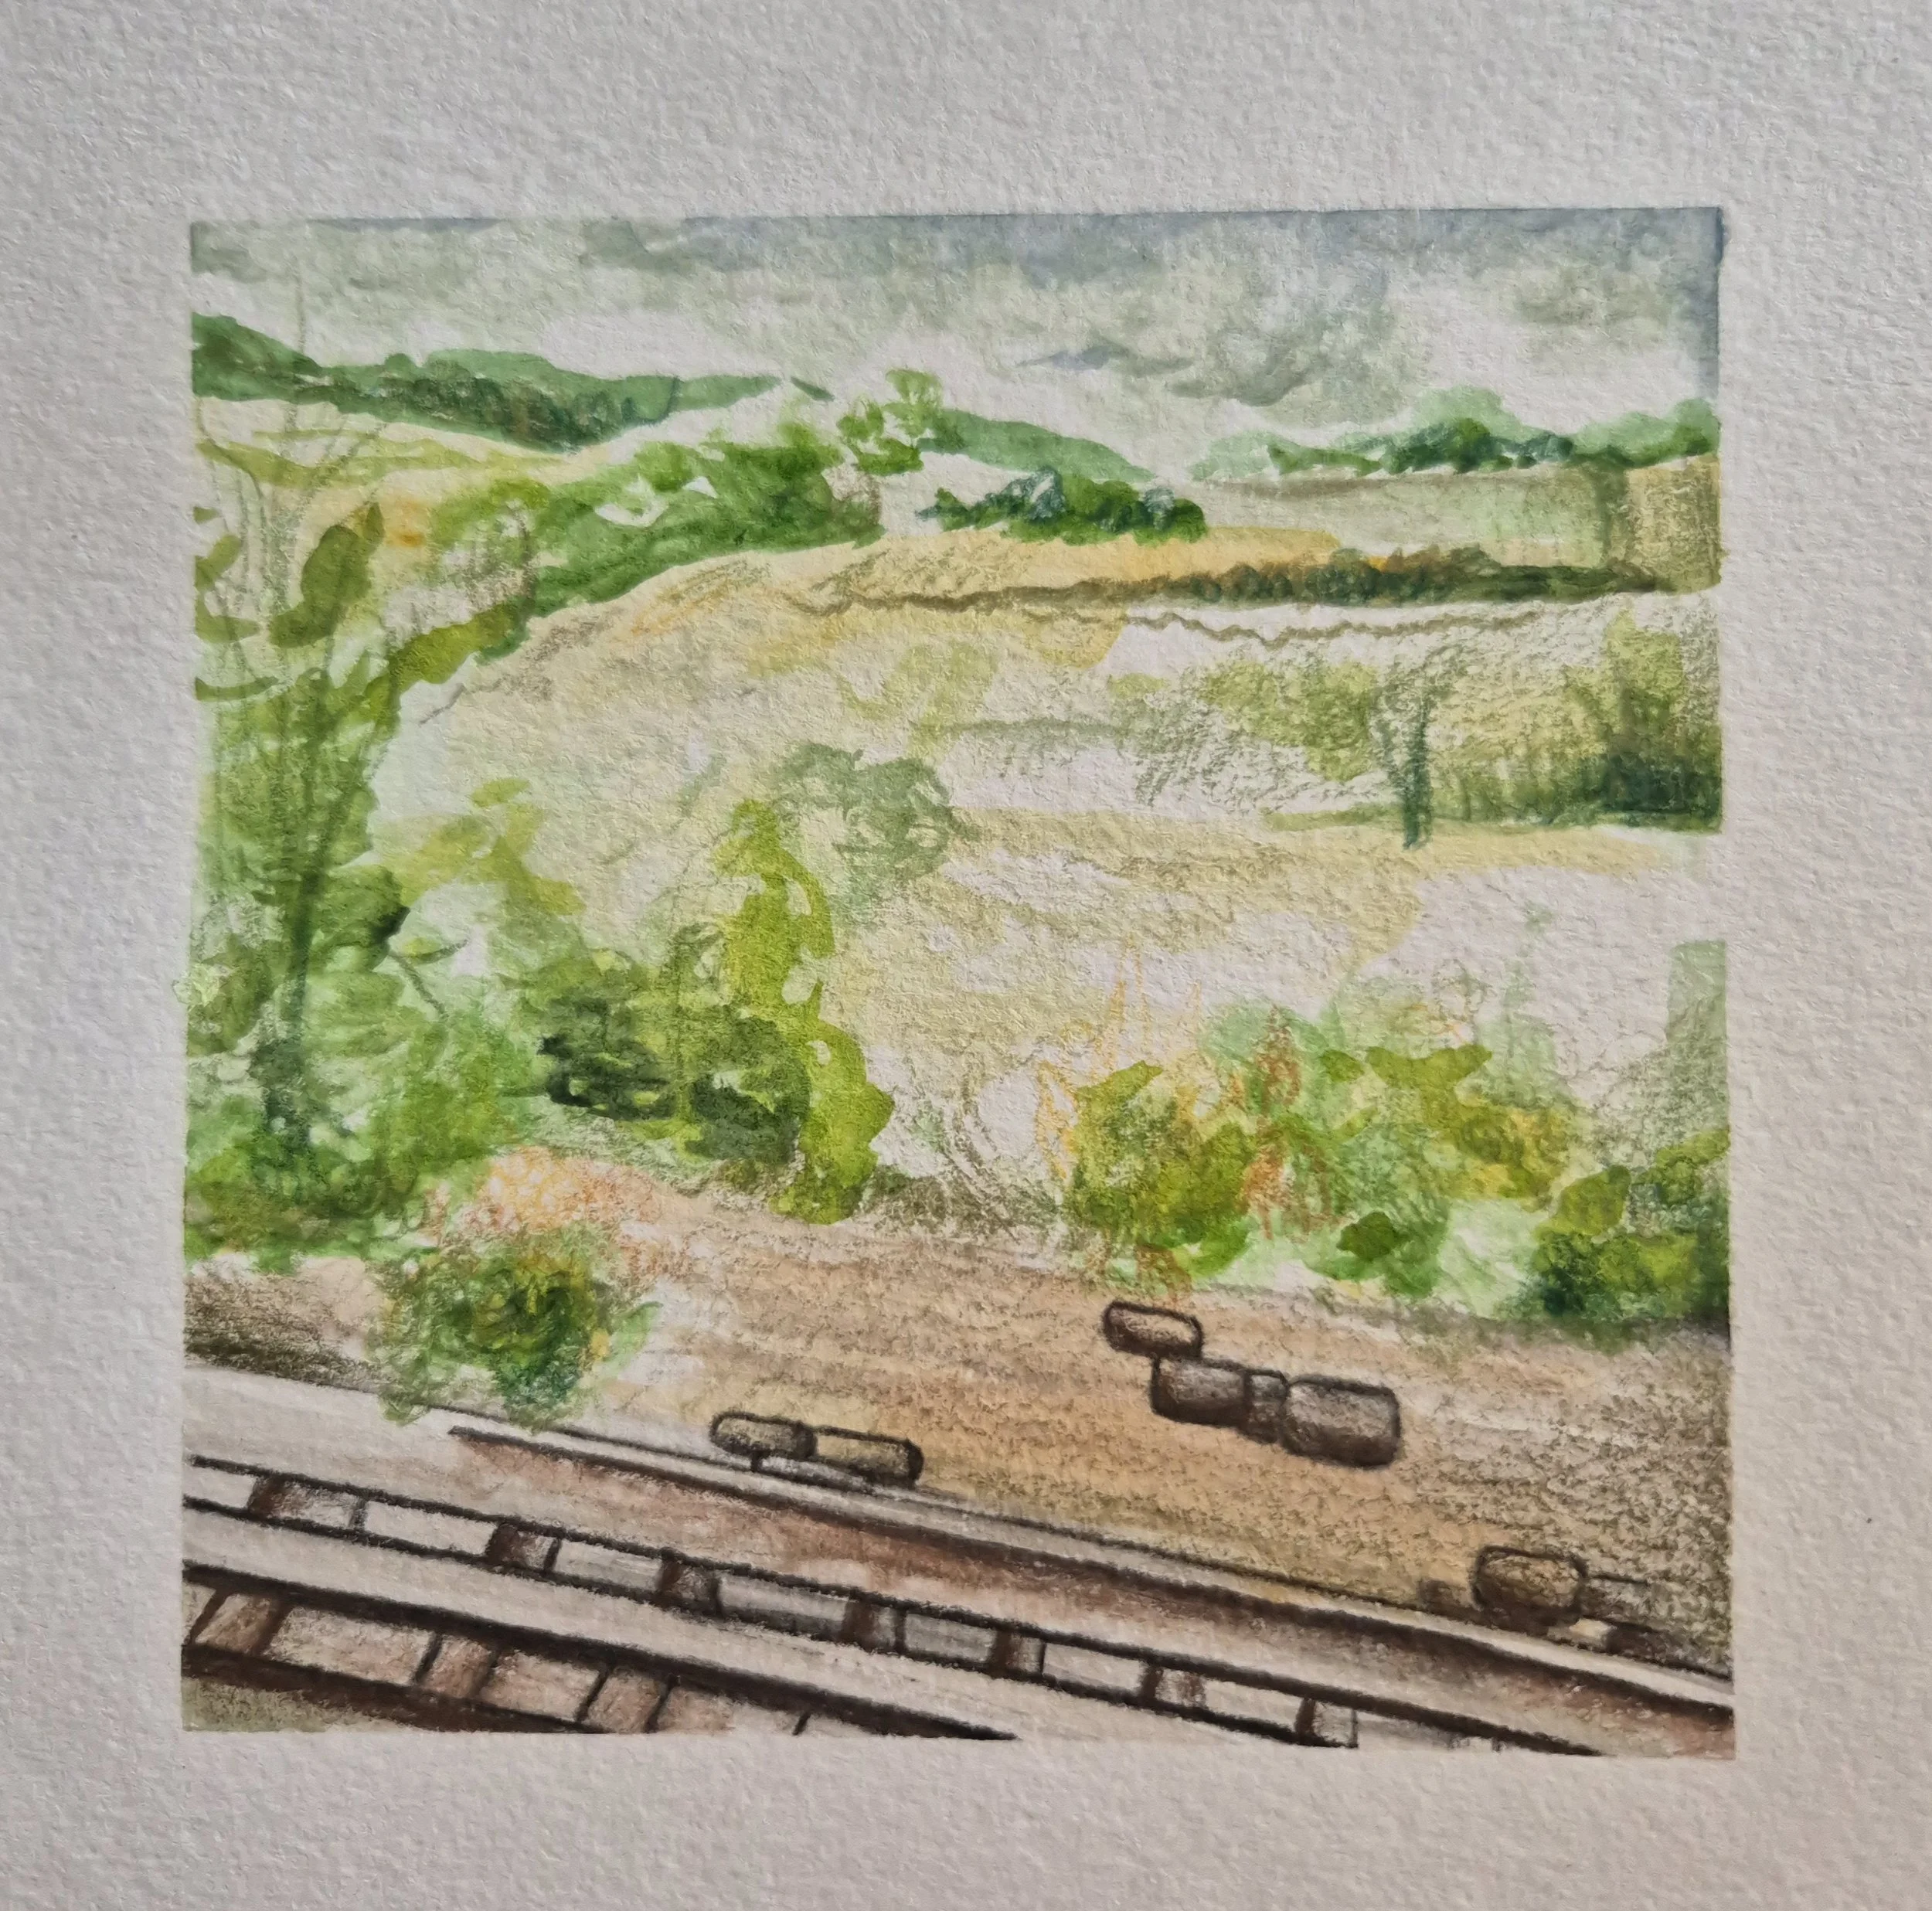
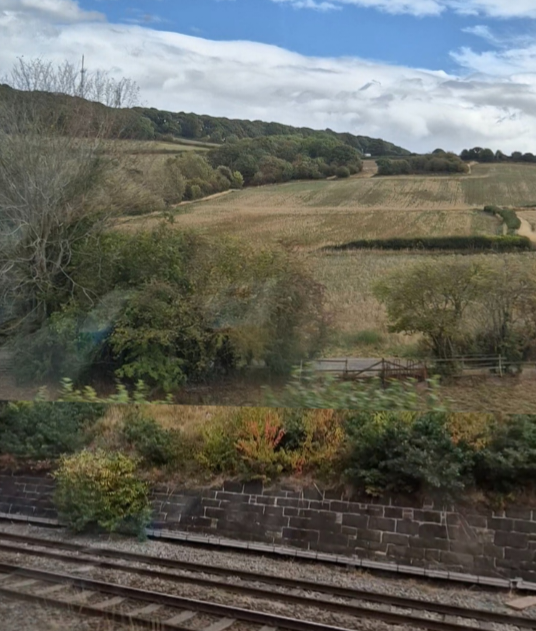
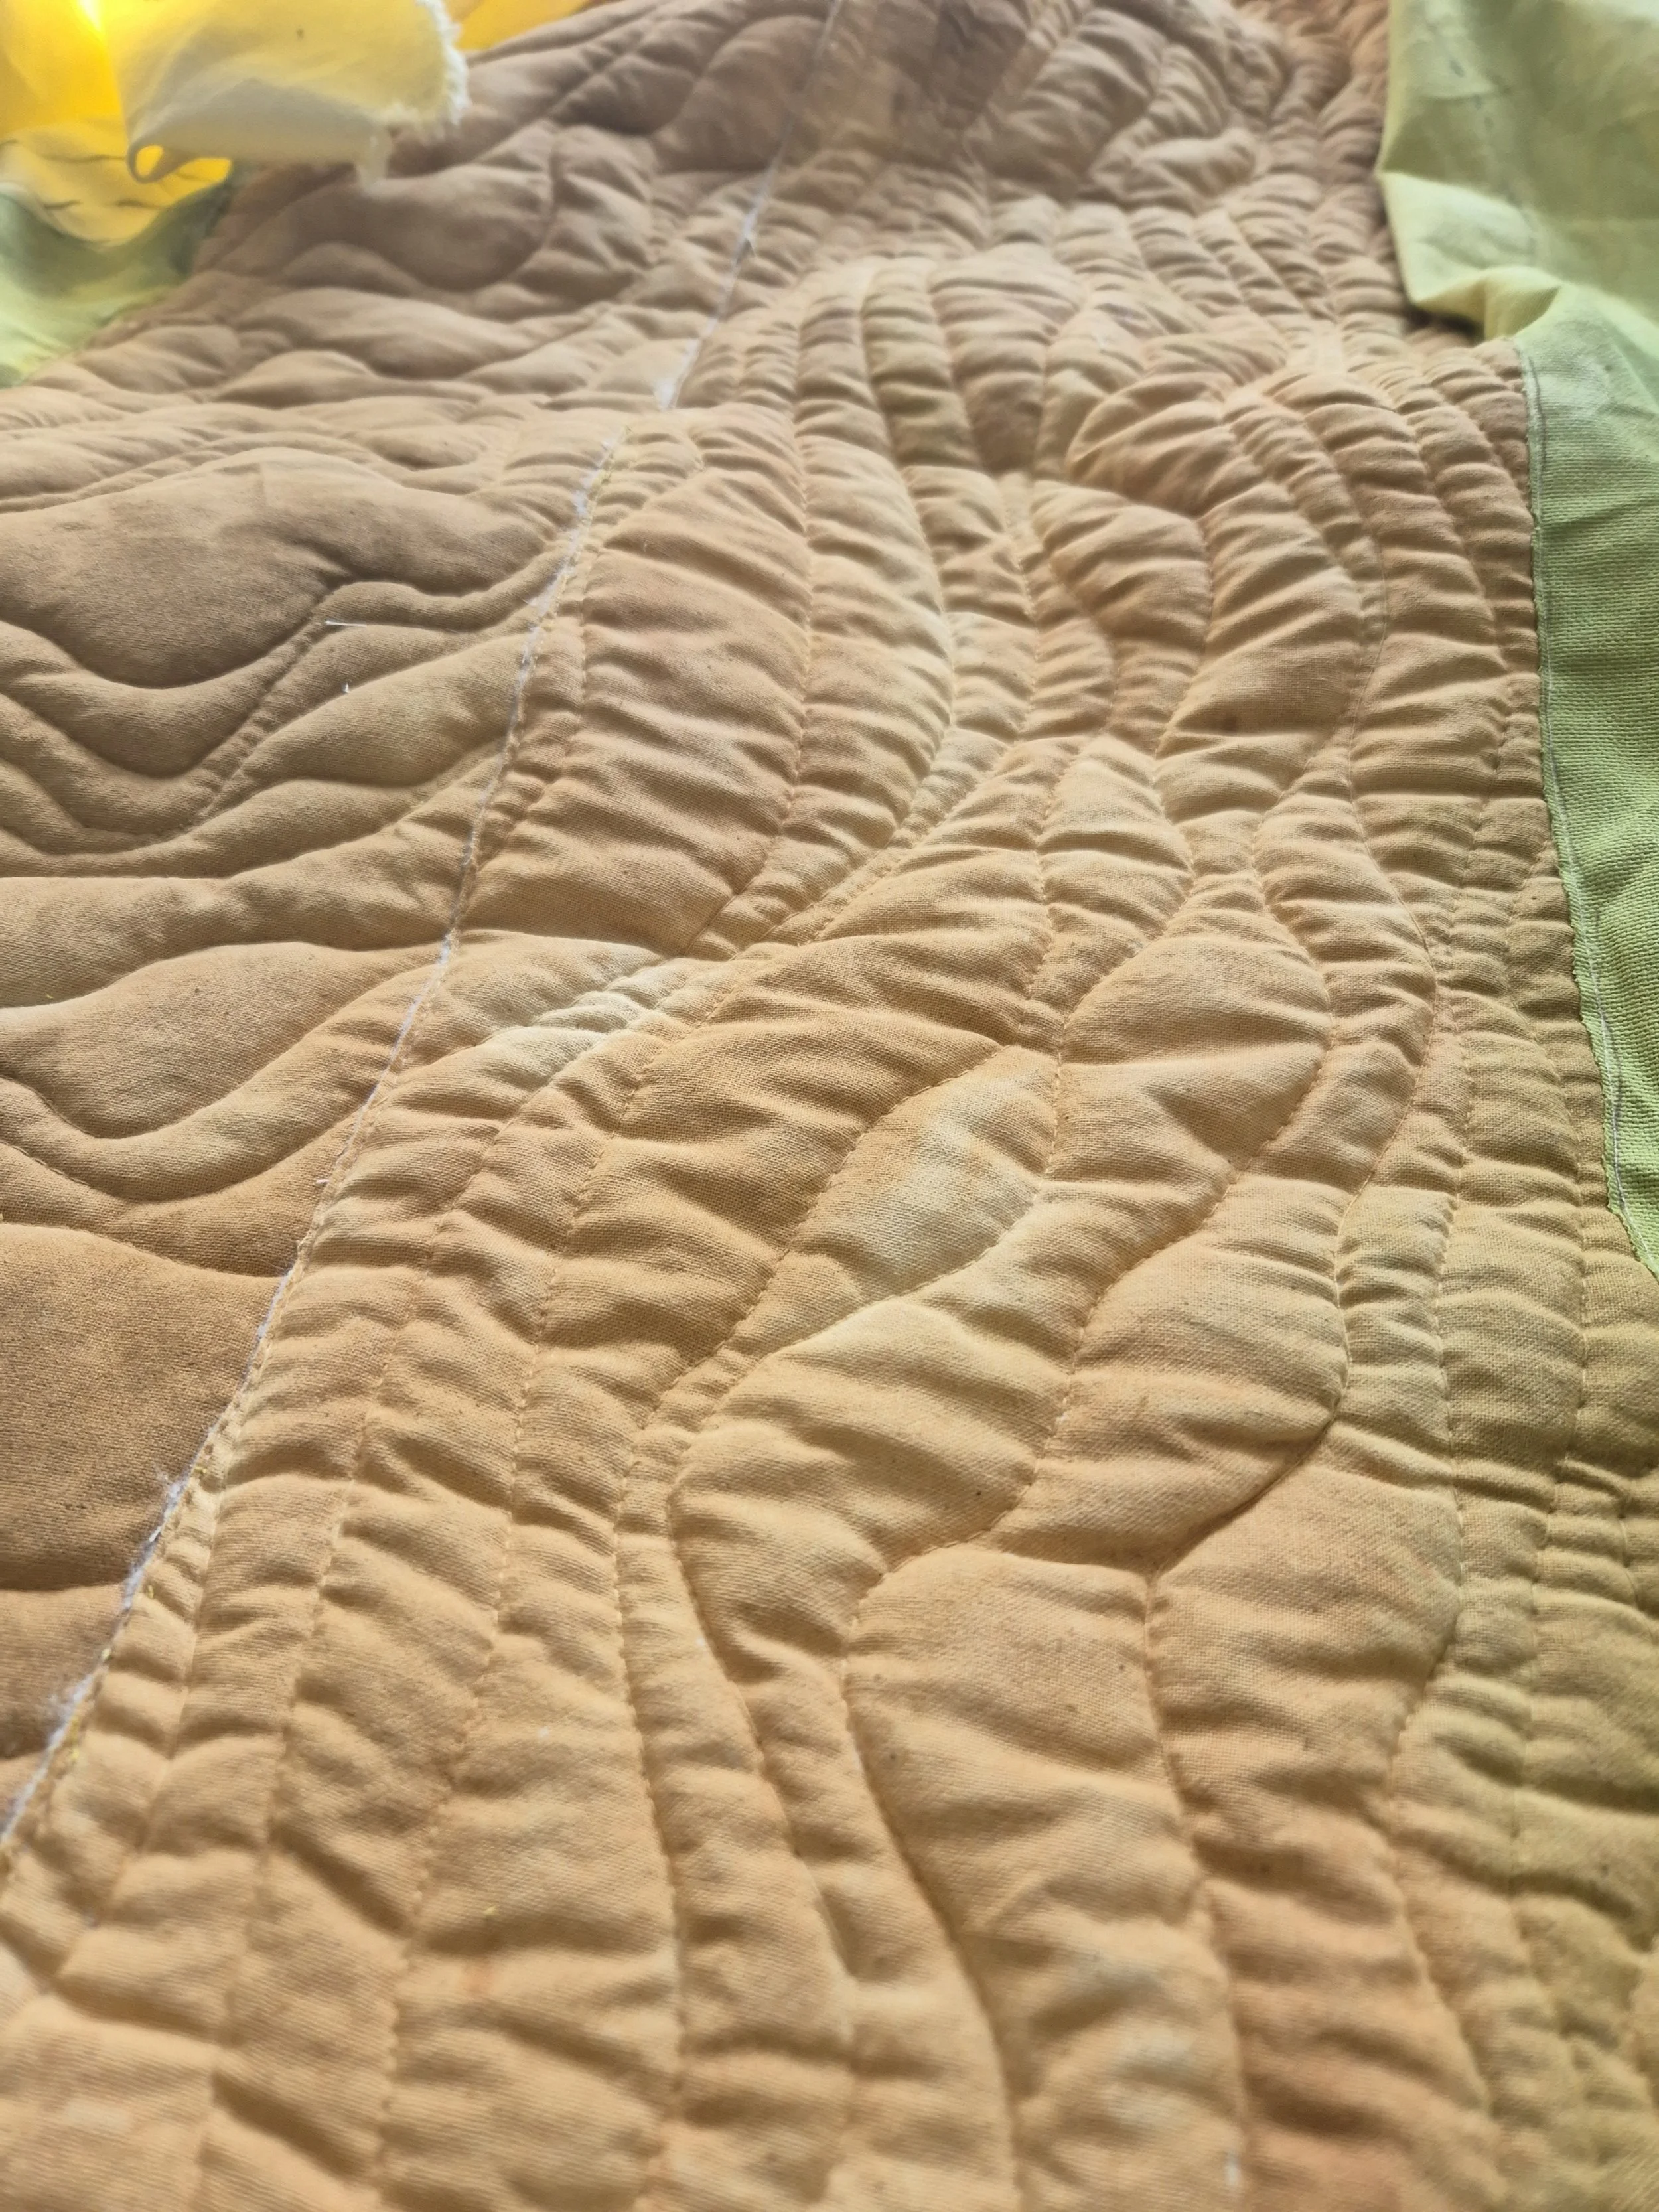
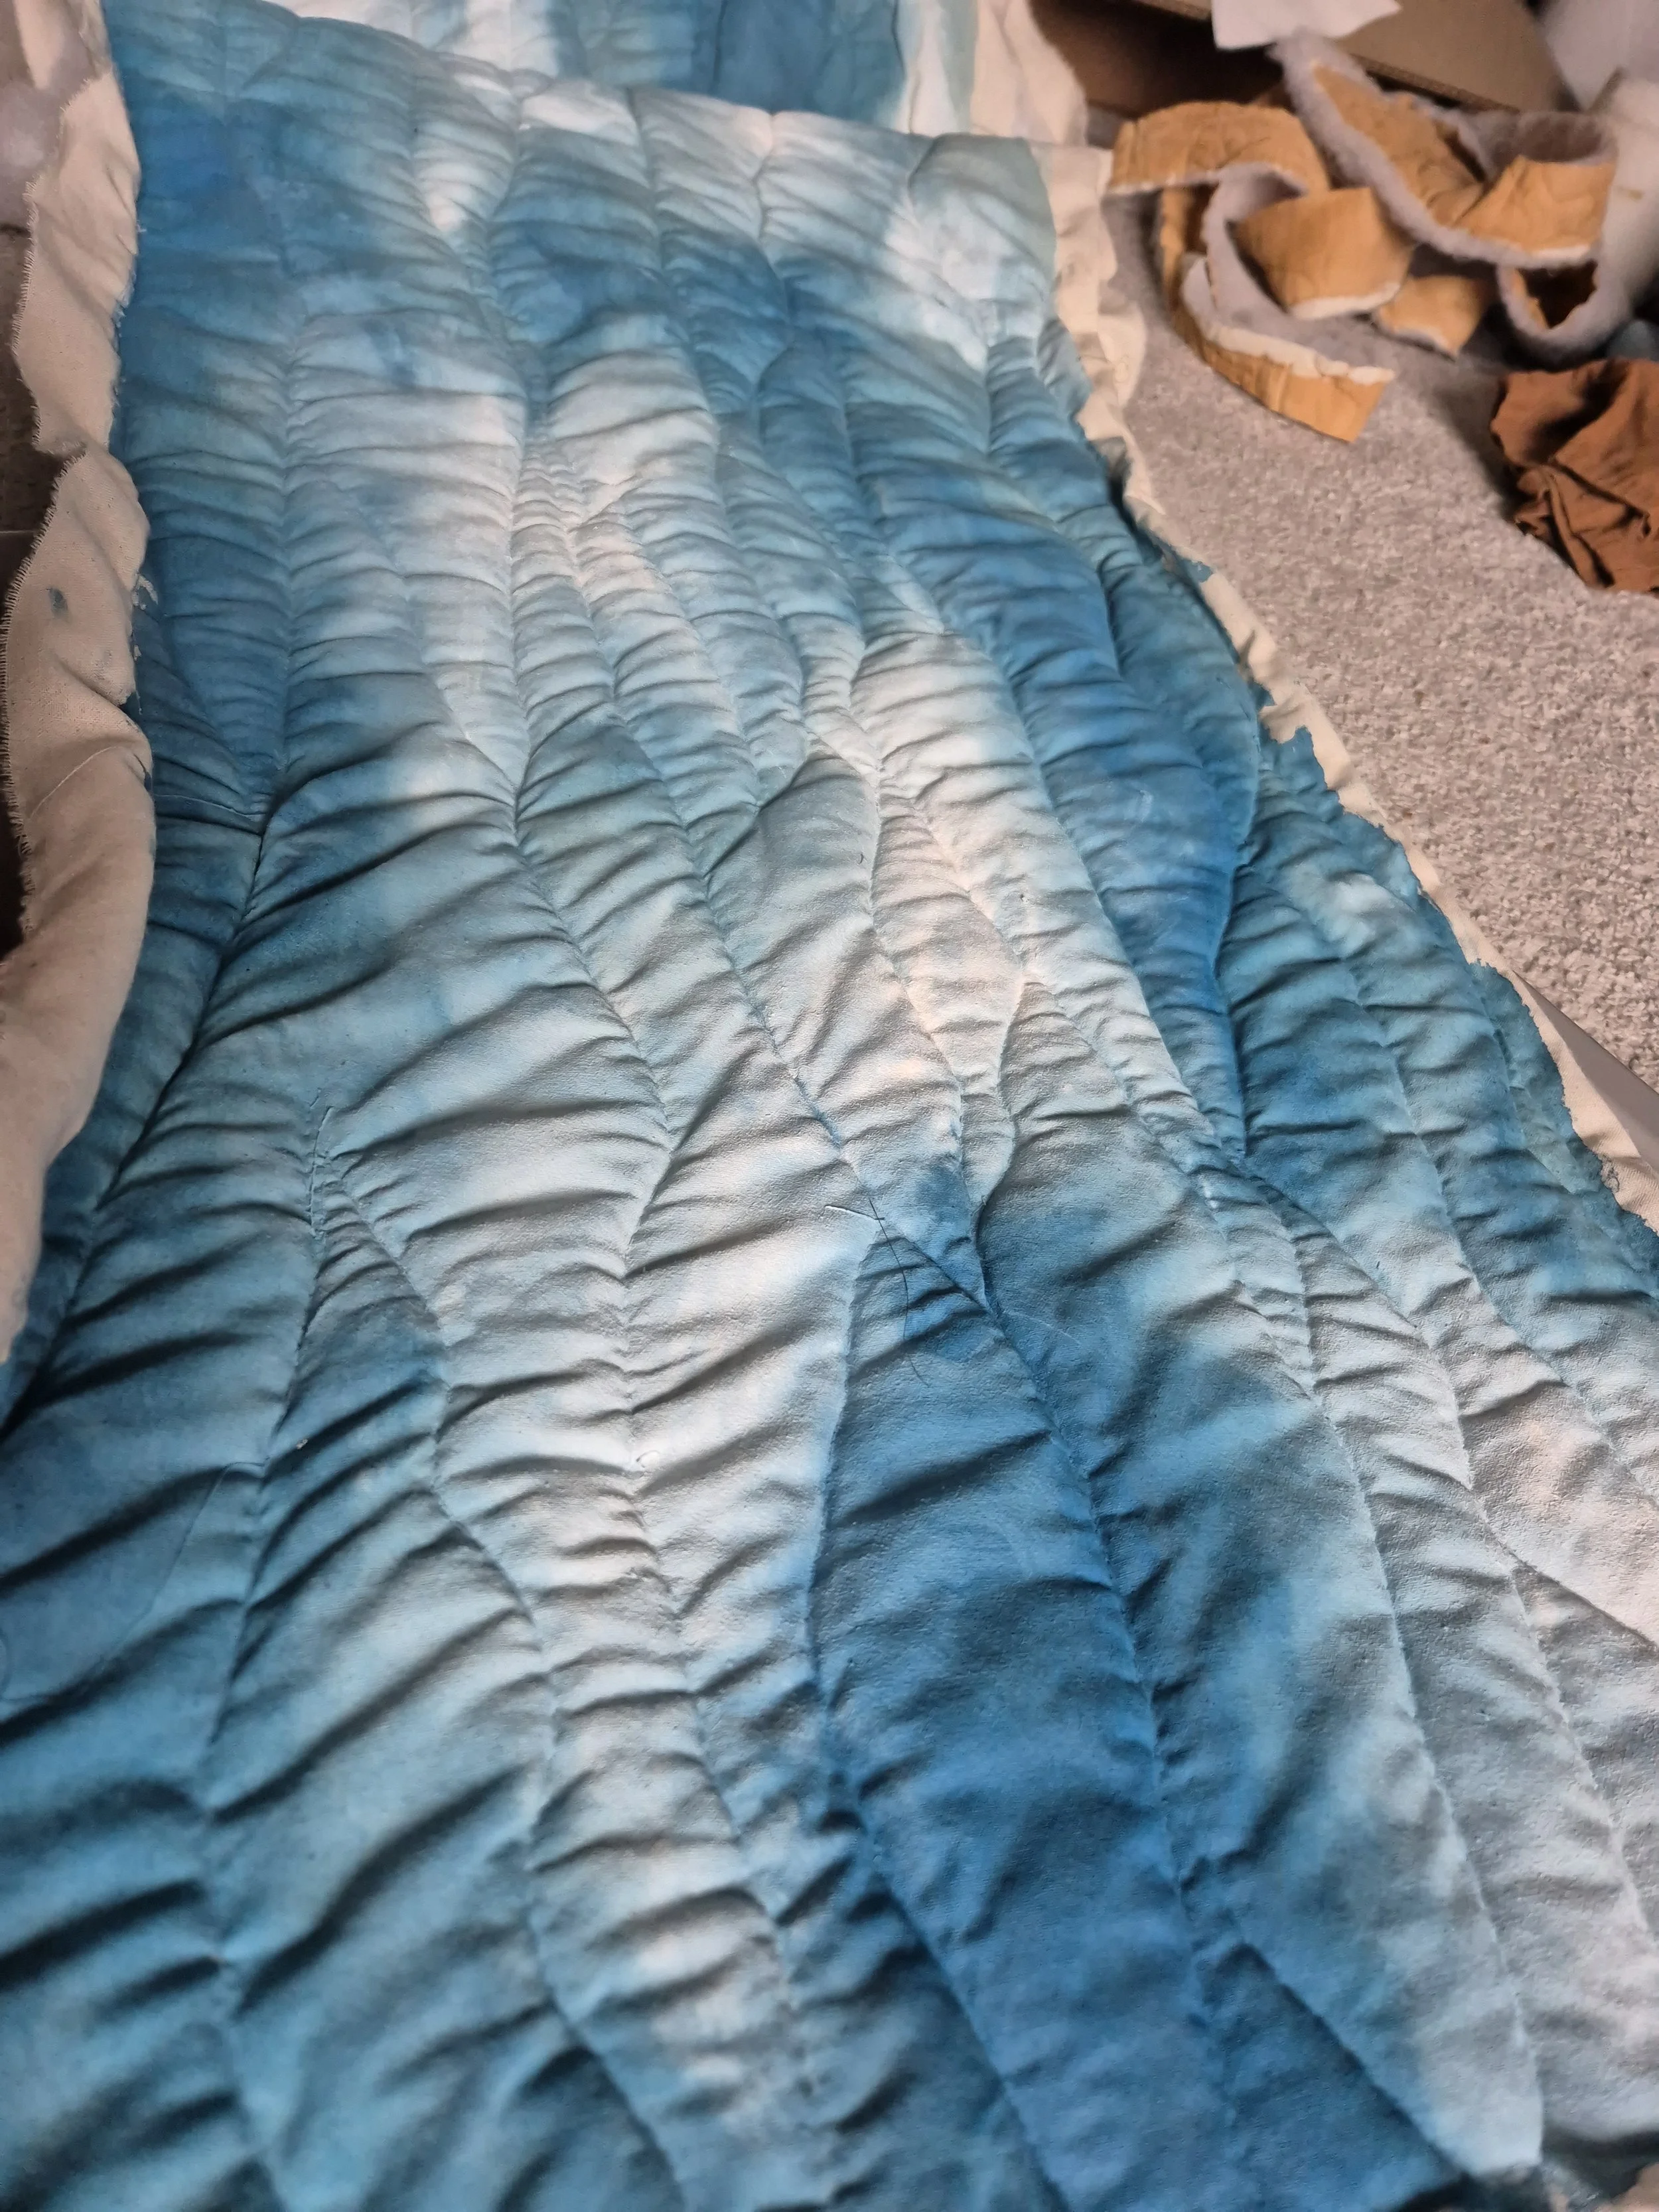
Using the same process as what I did last week, I began to create the large sections of fields and the whole sky. This was a lot of trial and error as I was creating each section as everything was much more complicated as I scaled up. These sections were roughly 1 ft high by 6 ft long, which meant that manoeuvring each piece of fabric around my sewing machine was a huge task for every single line I created. Instead of using my free-motion foot like I normally would, these larger sections meant I could keep my sewing machine attachments the same as if I was straight sewing, and simply sew at an angle to achieve the warped rows of stitch.
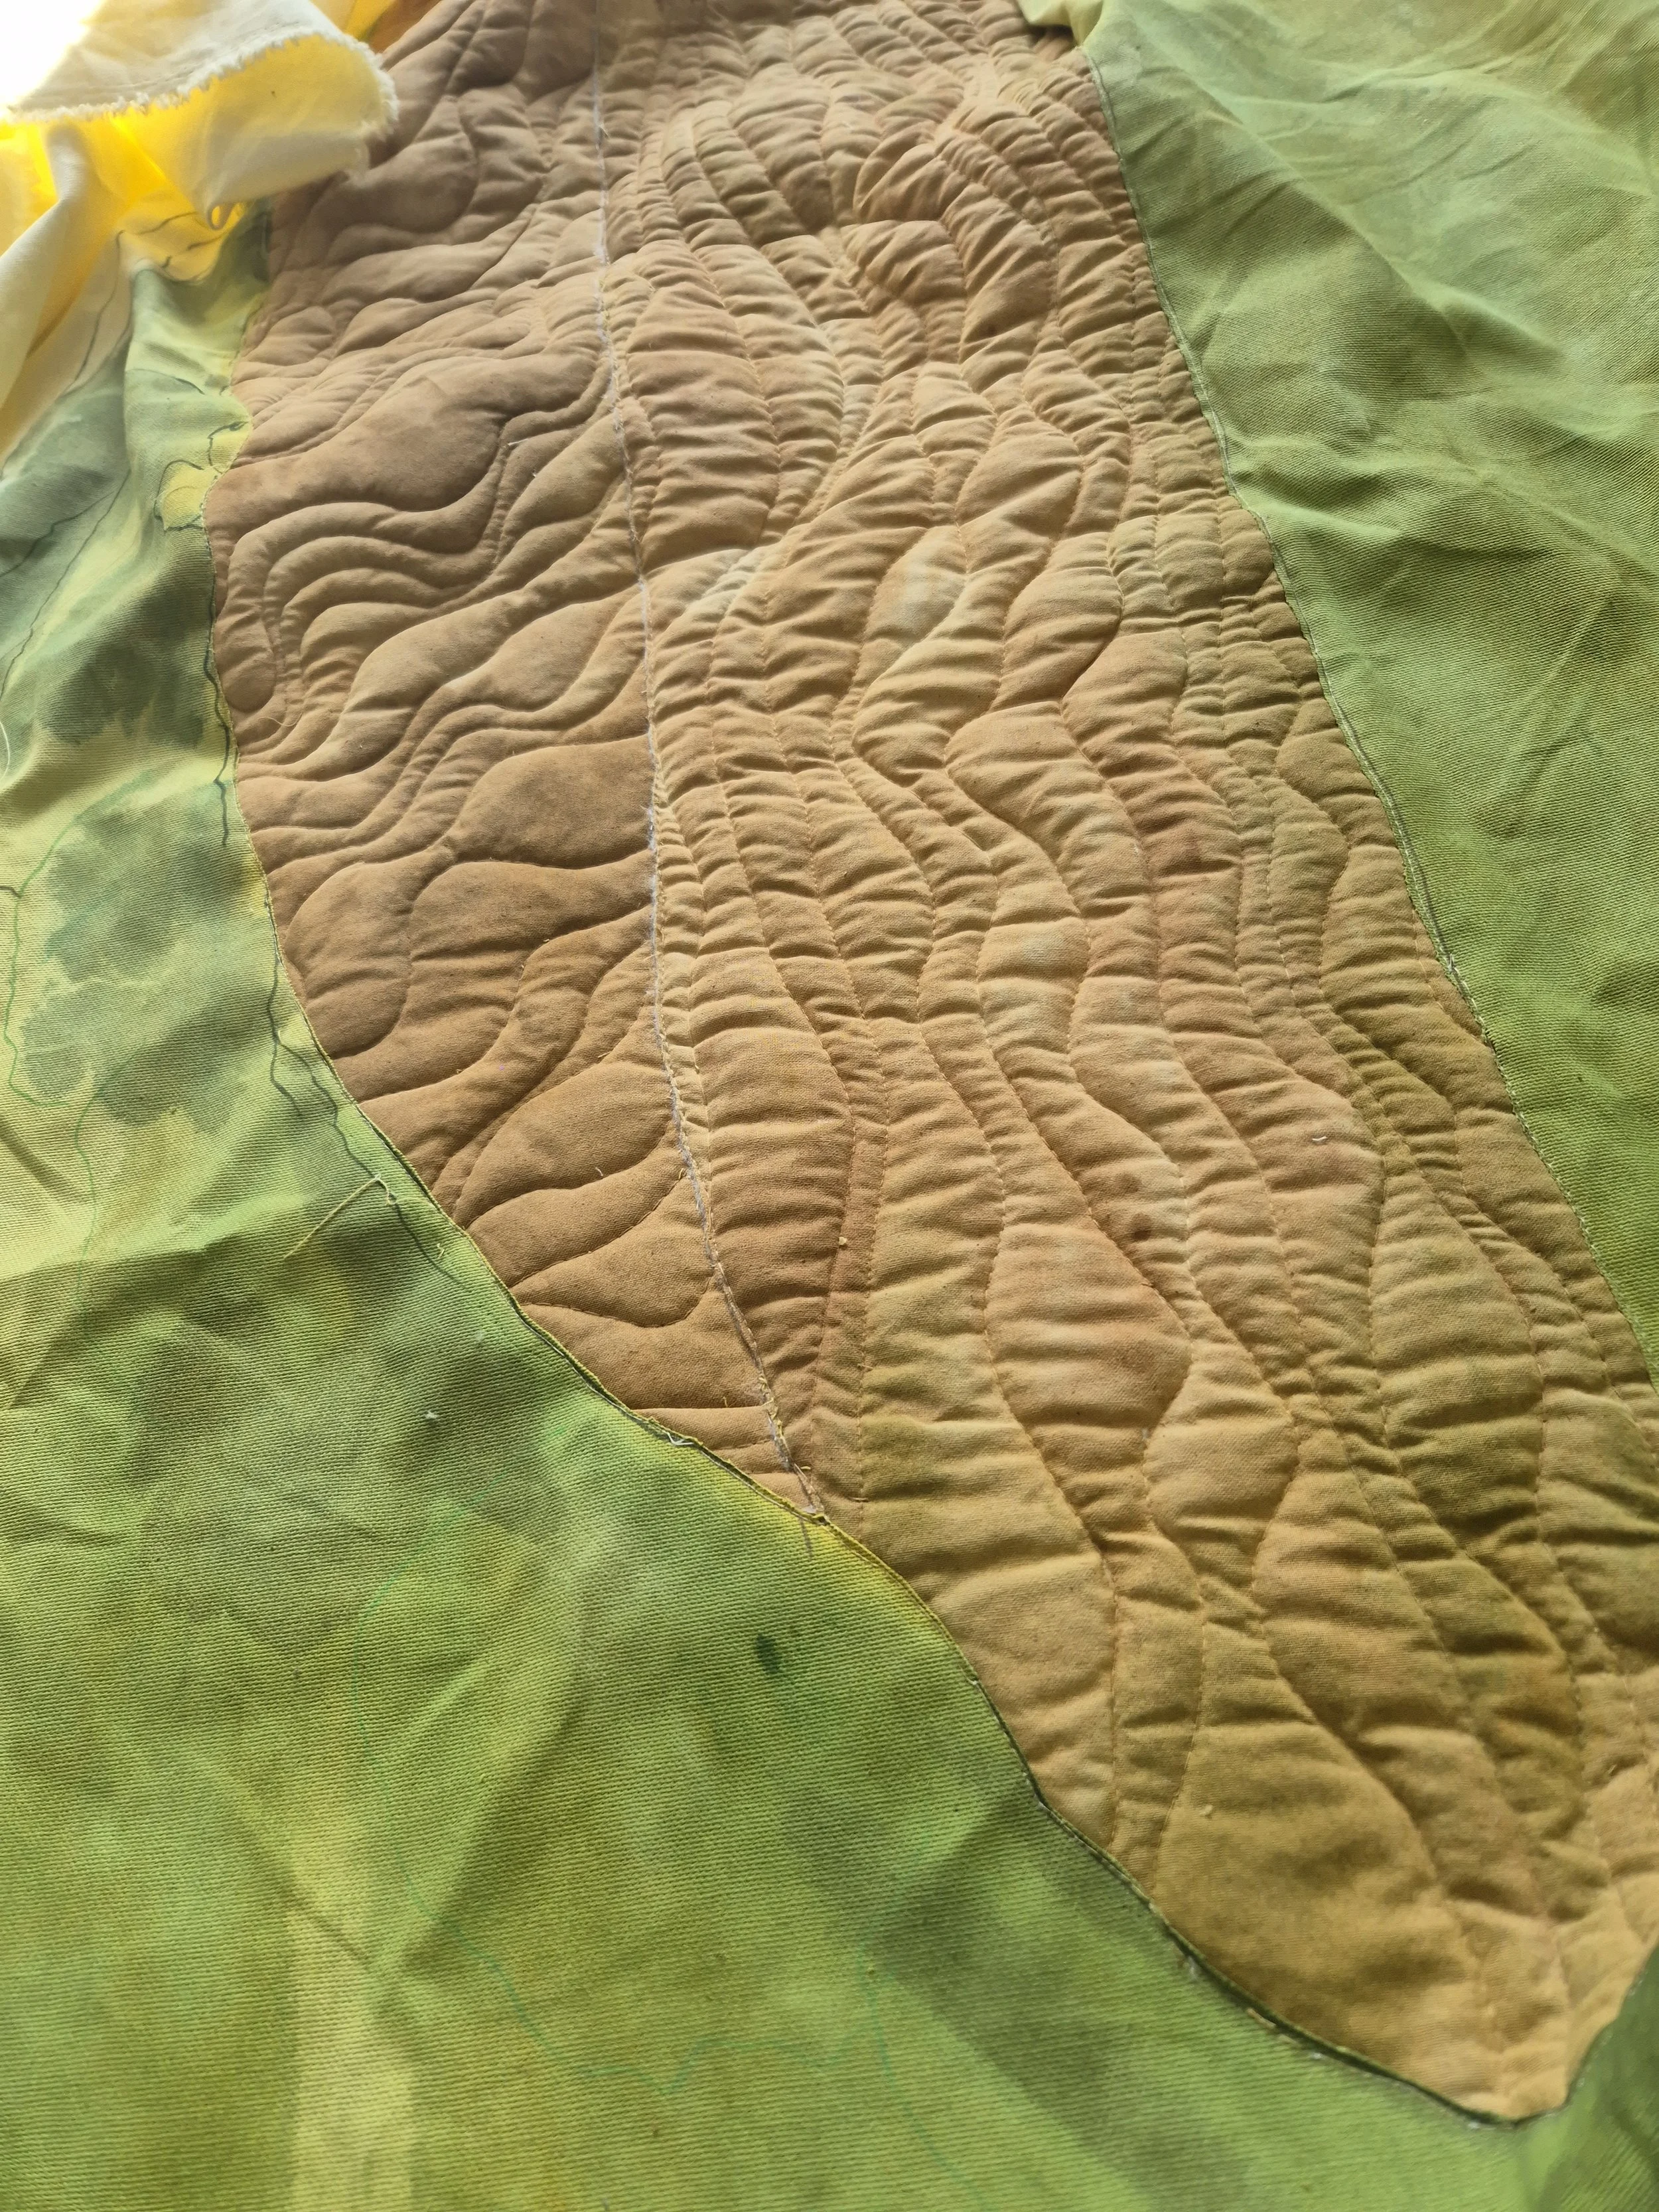
I then attached each section to the main fabric by a technique called reverse applique.
Reverse Applique: a sewing technique where the top layer of fabric is cut away to reveal a different layer underneath.
So in this context, the quilted panels are actually underneath the main fabric, but the top fabric is cut away to reveal the landscape scene. This technique helps to keep the front of the piece clean and hide all of the bits where each panel connects.
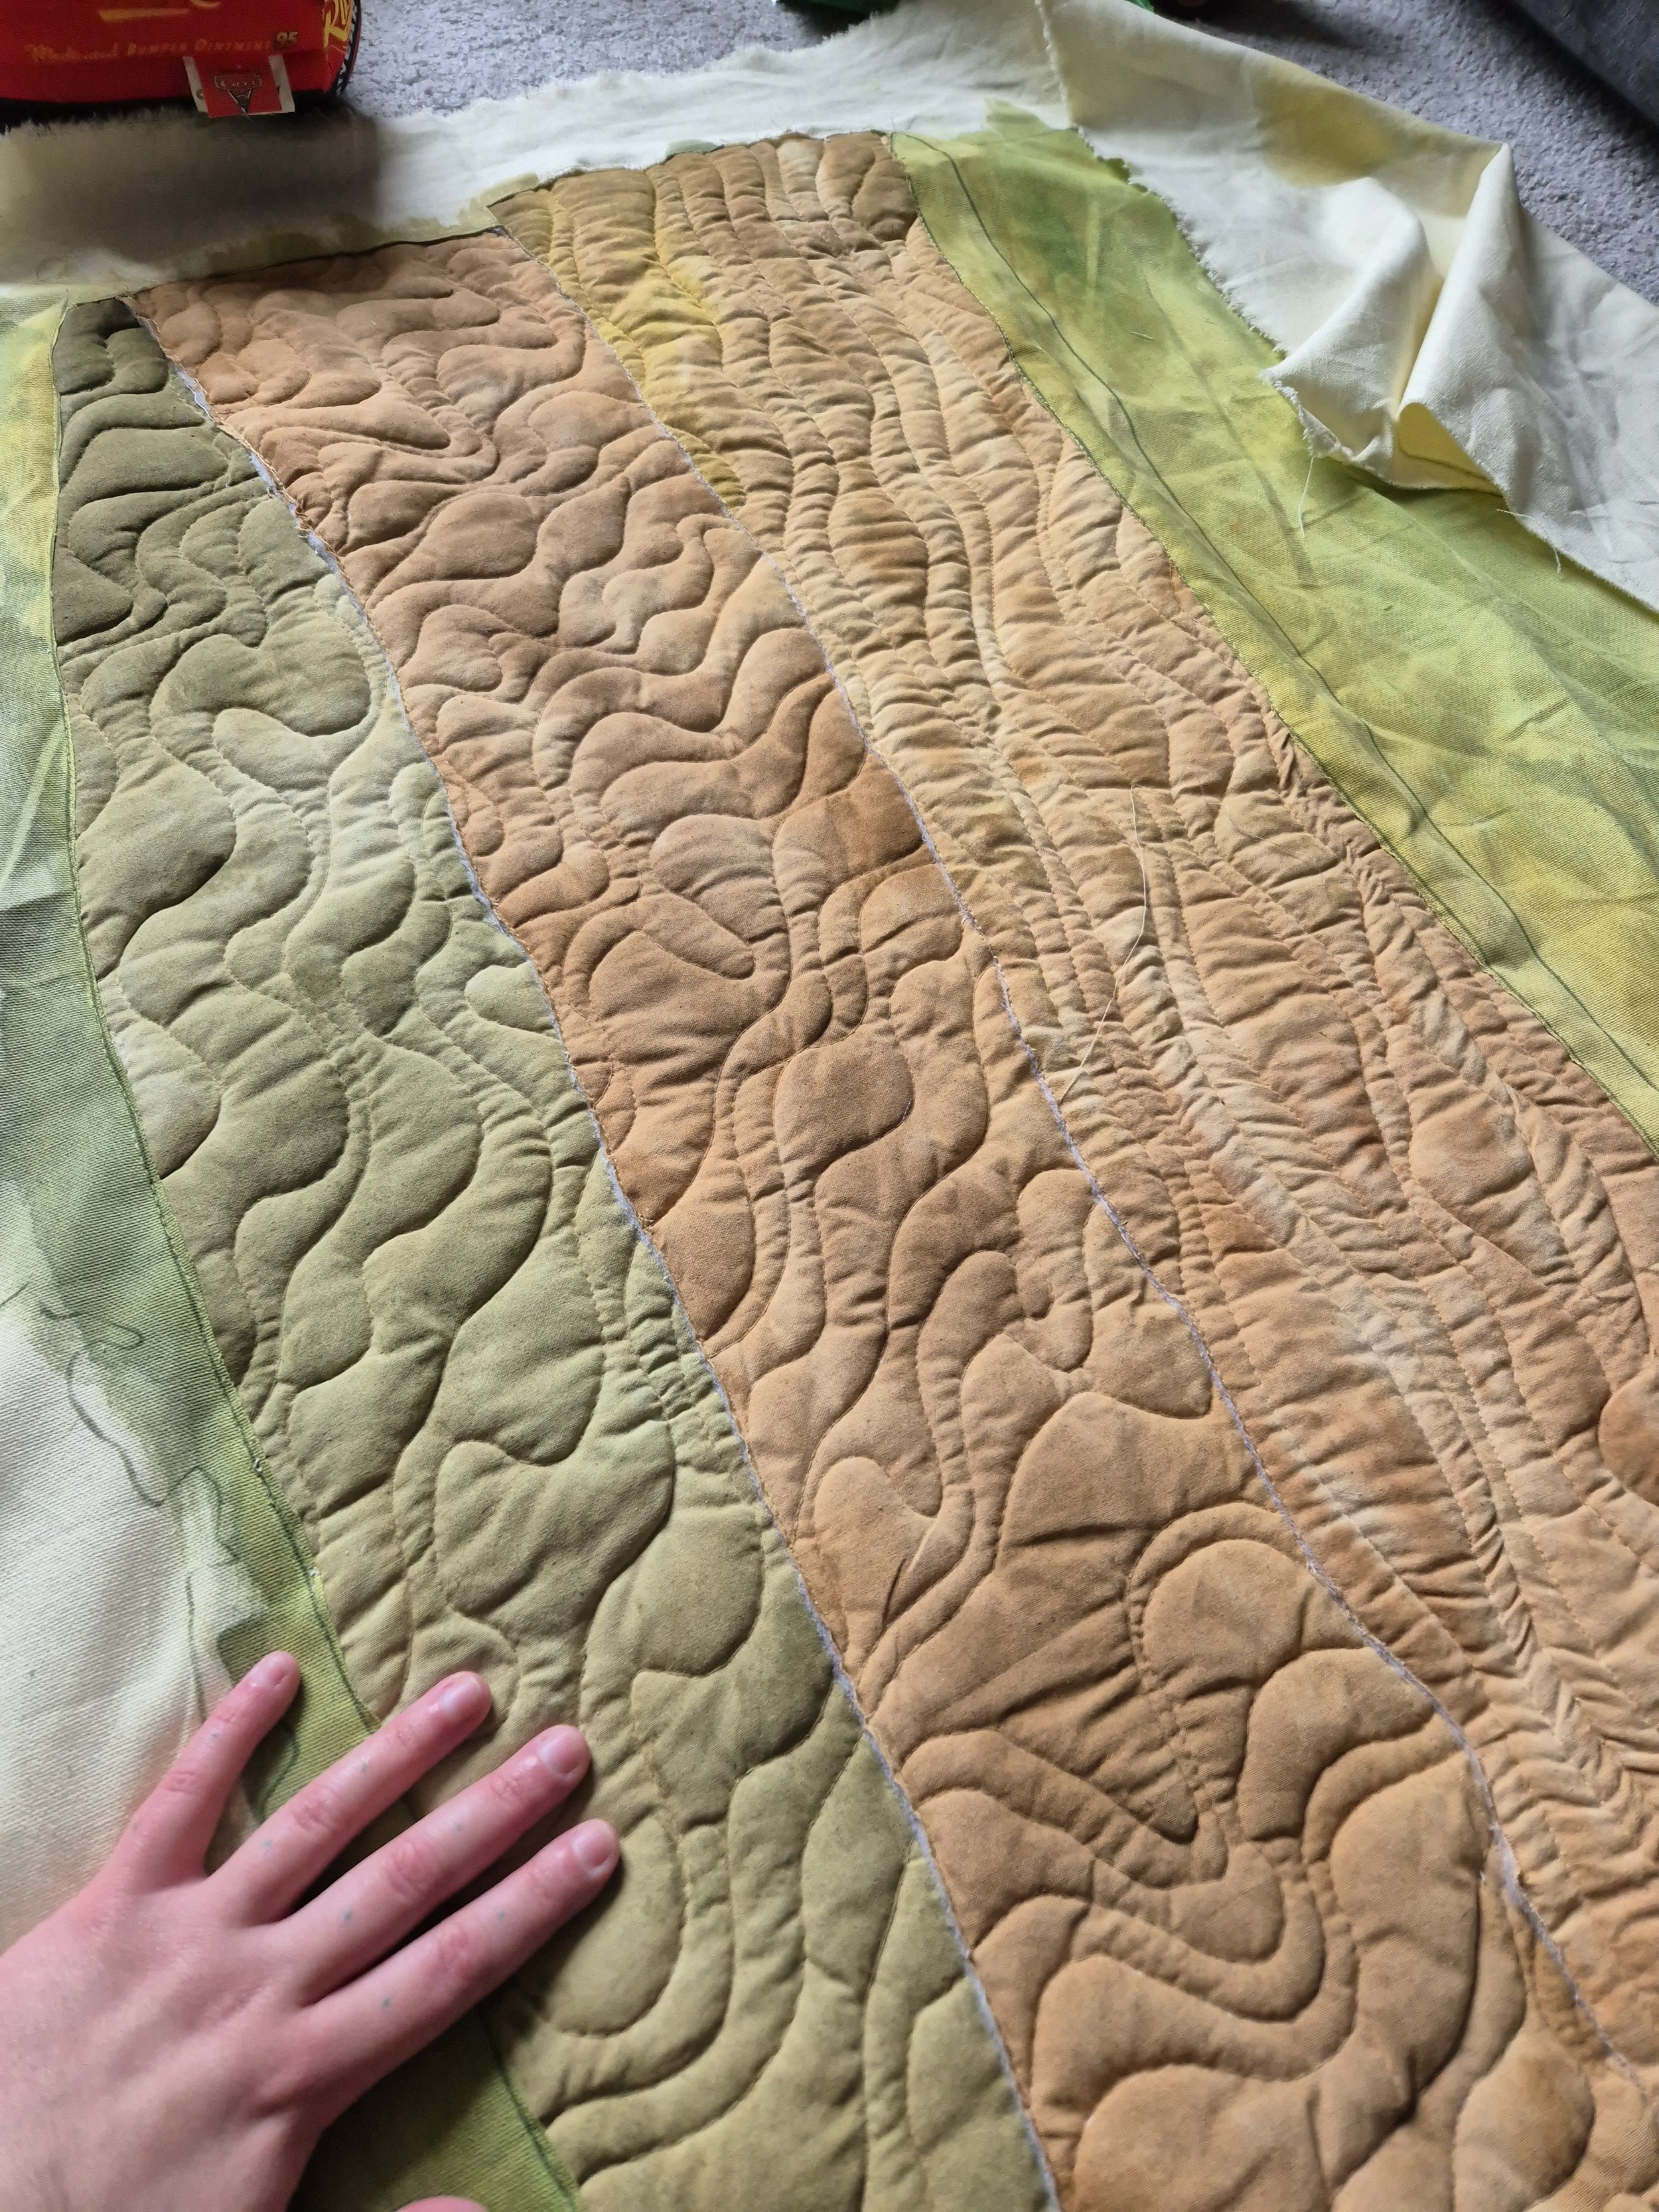
Each section has the quilted lines going in different directions to show the lines that would be in an actual field, where the farm vehicles have been.
Despite being pretty awkward in size, putting these together was really satisfying and quite a simple process. There are some issues I’m predicting I will face as a result of using these techniques. For instance, I’m unsure how well sections of free-motion stitch will hold up on top of the quilted sections and I may need to find a way to complete certain parts separately and attach them afterwards. But that’s all for next week, I’m really happy with the progress I’ve made so far and thank you for reading along with me!
-Jodie